This repository was archived by the owner on Feb 18, 2025. It is now read-only.
UI Editor Tutorial 2: Basic Interaction

- red frame are selected widgets.
- blue frame is the widget that mouse is hovering over it.
Press ctrl to multi-select / cancle-select widget.

- Hold down
alt+leftmouse button + move, if you see the arrows (all directions) then you can drag it. - Anyway, you could also modify position by a configurator.

- Hold down
alt+rightmouse button + move, if you see the arrows (right bottom) then you can scale it. - Anyway, you could also modify size by a configurator.
All widgets (except the Root) need to be added to a father (parent) widget that accepts it, and we call such father (parent) widget as Group Type widget (e.g. Group, Tab Group, Scrollable Group).

- You can find all available widgets in the toolbox.
- Drag a widget into a
Group Typewidget. - Rendering a green frame if such widget can accept it.
Sometimes you may want to modify the parent control.
- You can do this by the menu (right-clicking page) and cut/copy to the selected parent widget.
- A better way is to press the
shiftand move it into the new Group.
 Rendering a green frame if such widget can accept it.
In general, all the Group widgets have a children tab in its configurator, showing all children, you can adjust their order by dragging.

Right-click the page to open the menu.
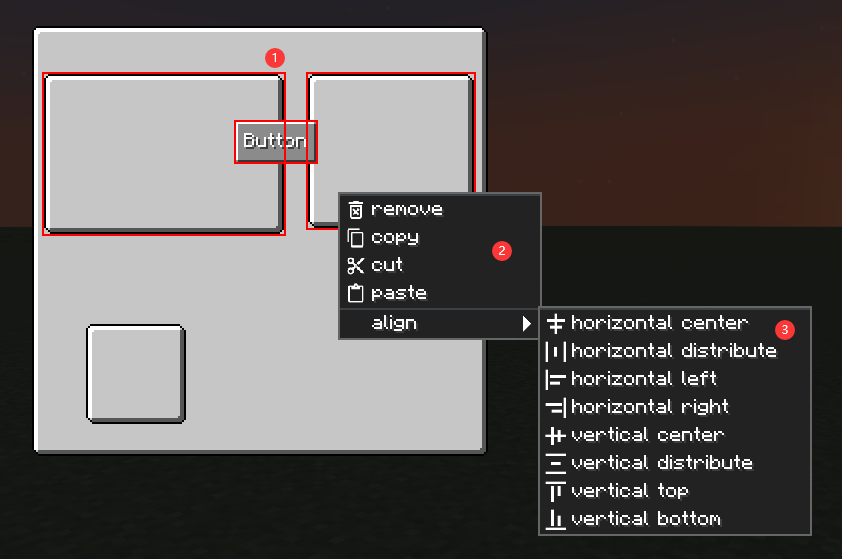
- All operations will be performed on selected widgets.
- Basic operations
- Align: availabe when you select multi widgets.